Quality Assurance
 MSI Quality Assurance Overview MSI Quality Assurance Overview
Mission Support Inc. (MSI) has an AS9100 & ISO9001 certified quality assurance system, enabling us to consistently manufacture and overhaul quality components and subassemblies for the US Air Force, Dept. of Logistics Agency (DLA), US Army Aviation, and Moog/Spectrum. We are also an FAA Certified Repair Station.
Quality Policy
“Mission Support Inc. is committed to providing products and services on time and at a reasonable cost; meeting or exceeding our Customers’ specified flight critical quality requirements and continually improving our Quality System effectiveness toward the goal of producing zero defects.”
MSI has established rigorous quality performance objectives to measure the Company’s success in implementing the Quality Policy, measure of process effectiveness, and overall customer satisfaction for all contracts. Statistics are kept for every activity controlled by the company’s Quality System, including receiving inspection, supplier quality and delivery performance, in-process inspection and final inspection, DCMO QAR in-process and final inspections, contractor performance assessments (CPAR), and product quality deficiency reports.
|
Quality Assurance equipment and capabilities:
|
Continuous Improvement
|
-
Mission Support Quality Assurance Inspection and Calibration Facilities:
-
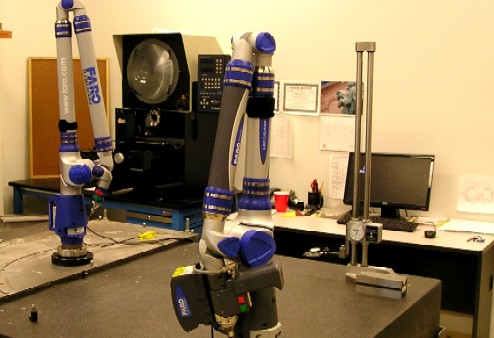
High Precision 3D Metrology equipment (Faro Arms, accurate within .0002”)
-
Verisurf, Mastercam, and Turbocad inspection/CAD/reverse engineering software
-
Eddy Current and Ultrasonic sheet metal and coating verification gages
-
Calibration and metrology program compliant to ISO 10012 and ISO 17025
-
RAB-QSA Certified auditor personnel
-
Full Range of Mechanical Inspection, surface plates and Dimensioning Tools
-
Controlled Clean Room for relative humidity, temperature, and particulate count (class 300,000)
-
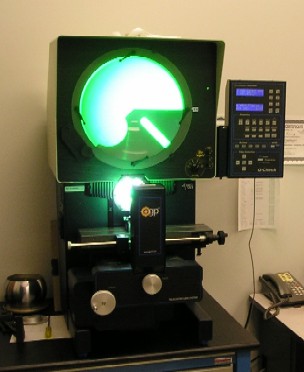
OGP Optical Comparator
-
Rockwell Hardness Tester
-
Mitutoyo SJ201 Profilometer gages
-
Calibrated 48" x 72" x 8" Grade A Granite Surface Plate
-
Air Gage system for ultra high-precision ID and OD measurements
-
Optical Flat System for inspection of helium light band flatness measurements
-
NX Unigraphics Design and Engineering Software
-
Govt. Audited MRB Bond Area
-
Allocated Receiving Inspection Area
-
Verisurf/Mastercam Inspection and Reverse Engineering CAD/CAM Software
-
Faro Arm 3D Devices for Inspection/Metrology and Reverse Engineering
-
Faro Laser Scanners
|
Mission Support Inc. continually plans, manages, and improves the effectiveness of the quality management system through the use of the quality policy, quality objectives, internal and external audits, analysis of statistical data, corrective and preventive actions and management review. Full system audits internally and externally take place at various times during the year.

|
|
Dedicated to Customer Satisfaction
|
Reverse Engineering and CAD/CAM Inspection Capabilities
|
|
MSI measures customer satisfaction through direct communication with our customers, detailed statistical metrics, and customer generated CPAR ratings. Rigorous quality objectives are in place and measured for all areas of customer satisfaction.
|
Mission Support Quality Assurance has the capability of reverse engineering aerospace parts into digital CAD Files for use in inspections with high precision and accuracy. MSI QA has successfully implemented modern technology into solving existing fit conformance problems with the B-52H Bypass Ducts, converting loft data models into CAD data, and using 3D metrology equipment and cad models in the calibration of assembly fixtures, as well as into the manufacturing of the ducts themselves at every level of processing. These implementations have effectively solved the fit problems of the critical attach points and contours that were existing in these ducts prior to these improvements. Mission Support QA has pioneered for production the combination of sheet metal fabrication with modern dimensioning technologies, performing real time CAD/CAM digital manufacturing and inspection of legacy aircraft components.
|
|
Contract Review
|
Statistical Analysis
|
|
MSI has a rigorous system of reviewing customer contracts, with detailed documentation of review to ensure that customer contracts are thoroughly reviewed and can be met.
|
MSI has implemented metrics for supplier control, processing data and internal/external inspection results for all contracts, as well as process sigma. Statistical results are published and reviewed each quarter.
|
|
Document Control
|
Supplier Control
|
|
MSI has a rigorous system of document control, with a network accessible/hyperlinked data system for drawings, tech. data, quality inspection records, and forms.
|
MSI has an ISO9001 system of supplier control, with RAB Certified ISO Auditor Personnel, and an effective receiving inspection program to ensure product integrity.
|
|
Reverse Engineering from Original B-52 Bypass Engine Duct Master Molds into 3D CAD Solid Models
|
|
|
|
|
Reverse Engineering to Digital CAD a KC-135 Refueling Nozzle Head Using Faro Arm, Verisurf and OEM Tech. Data
|
Inspection of B-52 Bypass Engine Duct Using Faro Arm and Verisurf Software
|
|
|
|
|
Example of a surface profile inspection report using Faro Arm, showing Live Contour Deviations
|
|
|
|
|
An example of a Reverse-Engineered B-52 Wrap Skin inspected for EOP Trim Lines
|
Inspecting for Hole/Slot True Position With the Faro Arm
|
|
|
|
|
Reverse Engineering Capability for Loft to CAD Conversions based on
Point Cloud Construction of Surfaces and Contours, Using Laser Scanners and Faro Arms
|
Features of Our 3D CAD Inspection/Reverse Engineering Software And Faro Arm/Laser Scanner System
- Analyze the deviation between the 3D CAD model and collected CMM Data
- Create deviation reports form the CMM data to Points, Curves and Surfaces
- Best-Fit – with full control over all six axes
- Flexible Multi-Surface tolerance
- Instant Text, Topographical Color Reports, Whisker and Error Mapping
- Color plots for hardcopy printouts
- Quick Alignment of CMM Data to the 3D CAD Model
- Programming can do vector approaching automatically
- Points may be generated with any measuring device
- Inspect thousands of surfaces and / or curves quickly
- Automatic Probe Radius Compensation

Mission Support Has Been Featured in Quality Digest Magazine, as Well As a Case Study Done On The Faro Web Site. See also the Faro Video Profile Done On MSI By The Faro Company
|
Reverse Engineering With a Faro Arm / Laser Scanner
|
|
